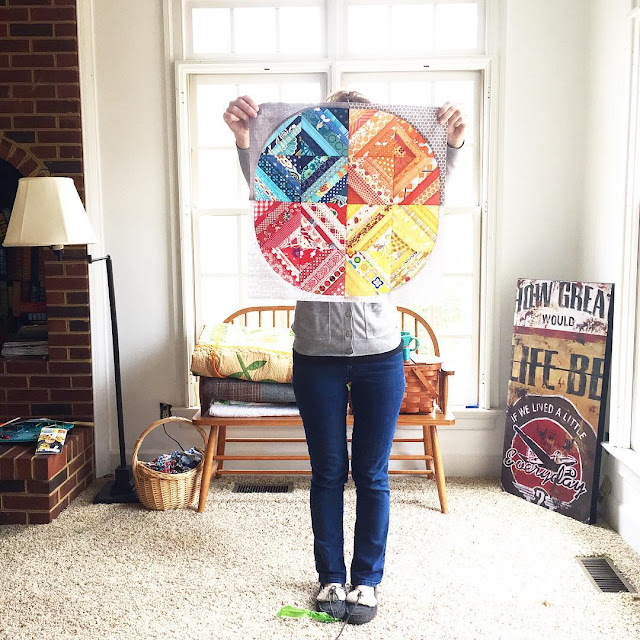
There are a huge amount of WIP's up on the design wall currently. I have shamefully not shared any of them here on my blog. As I make them, new ideas or projects are thrown at me and...
well...
I am weak 😂😂😂
I see something new or am starting something new with an actual hard deadline and WHOOSH! Off my mind and body go into the new project, leaving what is on my wall in the dust!
That is the case with these beautiful string quilt blocks.
The colors and ease of making these blocks is why they really are at the top of my list at the moment. You will be hooked too after you watch my short how-to video for how to make your very own string blocks at the end of this post!
Also, I have included a link up party this week for you to share your lovely WIP's! Let's get excited about our progress together!
The foundation string quilt blocks take what some would call waste ( crazy talk) and make the most beautiful blocks!
My scarps are sorted in color order to make me feel like I am doing something constructive with all of the piles of fabric pieces I create!
Another wonderful attribute to these blocks is the ability to use those precious tiny bits of fussy cut fabrics that we ALL love! Okay, I LOVE! These are the ultimate I-Spy with fussy cuts as small as 3/4 "
THAT is TINY!
Given the variety of colors, these also make fantastic baby or youth quilts. Depending on the size you are making, you can have one of these tops completed in a DAY!
Look at all these fun blocks!
These blocks stitch up rather quick and they honestly NEVER look bad!
For these 5" string blocks you need :
Inexpensive muslin for the foundation block ( with a foundation block, you are not removing the base...or muslin)
A variety of scraps ranging in width from 3/4" to 1.5" ( the center piece needs to be at least 7.5" length to cover the center diagonally)
Aurifil 50 wt ( the orange spool) The thinness will help the blocks lay flat!
And a great disposition because well we are SEWING!!!! YAY!!!
I
I would LOVE to see your WIP's this week! I am trying out a link up! Share your projects by linking them up below!
It would be especially exciting to see some of your colorful string blocks ( wink wink)
Next week I will share more about the curved piecing shown in the first photo because:
1. It is an AWESOME tool that you MUST have and
2. I am trying to plan ahead to get my blogging game back up to speed
Linking up to
Finish it Up Friday


3 comments
Thanks for a really clear tutorial. So the white square is fabric rather than paper? That makes for a very thick block. I notice the first picture includes curved seams. Does the thickness of the strip piece make that curved seam more difficult?
I've been thinking of doing string blocks and I LOVE the way you've done it with the rounded edges! I'm inspired to really do it now ( I've got so much fabric and looking for a way to reduce it), thanks for much for the tutorial.
I love your rainbow string blocks. They're such fun. Thanks for the great tutorial.
Post a Comment